


 NV Energy
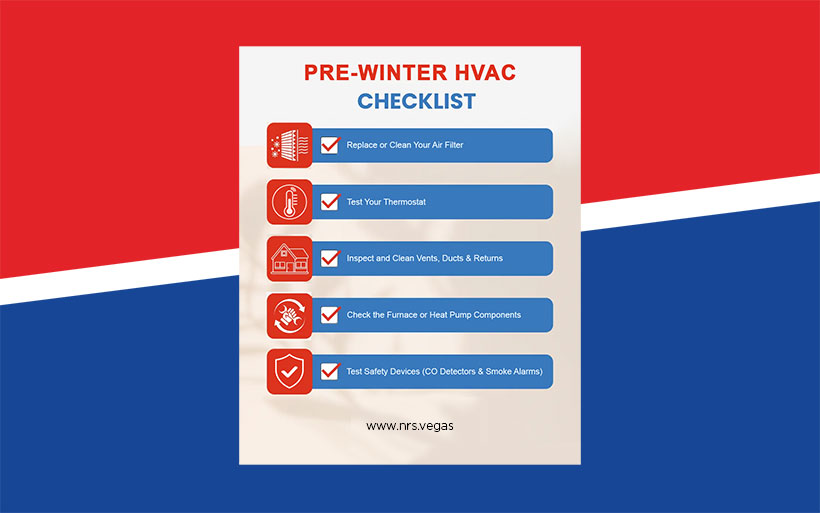
Prepare Your Home for Heating Season
In Las Vegas when temperatures plummet and you switch on your heating system for the first time, the last thing you want is to discover it's not working or running inefficiently. Every winter, thousands of homeowners face preventable problems: furnaces cycling on and off repeatedly, uneven heating, strange odors or noises, skyrocketing utility bills, or complete system failures requiring emergency repairs at premium rates.
Emergency HVAC service calls during peak winter season can cost 50 to 100% more than routine maintenance, and poorly maintained systems increase heating costs by 15 to 30% throughout the season. Neglected heating systems also pose serious safety risks, including carbon monoxide leaks, fire hazards, and poor indoor air quality that aggravates allergies and respiratory conditions.
Nearly all of these problems are preventable with thorough pre-winter
This comprehensive checklist guides you through five essential maintenance tasks. Some you can handle yourself with basic tools and knowledge, while others benefit from professional expertise and specialized equipment.
1. Replace or Clean Your Air Filter
Your
Why Neglecting It Can Backfire
When air filters become clogged with dust, pet dander, pollen, and other particles, they restrict airflow through your system. This forces your furnace or heat pump to work harder to push air through the blocked filter, increasing energy consumption by 5-15% and putting excessive strain on the blower motor—which can lead to premature failure and costly repairs ($400-600 for motor replacement). Restricted airflow can also cause your heat exchanger to overheat, triggering safety shutoffs that leave you without heat, or worse, cracking the heat exchanger (a $1,200-2,000 repair that often necessitates full system replacement).
Beyond mechanical issues, dirty filters compromise your indoor air quality. Instead of trapping allergens, mold spores, bacteria, and dust, a saturated filter allows these contaminants to recirculate through your home, potentially triggering allergies, asthma attacks, and respiratory issues. This is especially problematic during winter when homes are sealed tight.
Maintenance Schedule
Standard 1-inch pleated filters should be checked monthly and replaced every 1-3 months, depending on factors like pet ownership, household size, and local air quality. Homes with multiple pets or allergy sufferers should replace filters monthly. Higher-efficiency 4-5 inch media filters can last 6-12 months but should still be inspected quarterly. Set a phone reminder or mark your calendar to check filters on the first day of each month—this simple habit can prevent countless problems.
DIY vs. Professional
This is definitely a DIY task that any homeowner can handle. Filters cost $10-30 for quality pleated options, and replacement takes less than 10 minutes. However, if you've never changed your filter or can't locate it, just give us a call – our professional
2. Test Your Thermostat
Your thermostat is the command center of your heating system, it's sort of interface between you and your heating equipment. Even a perfectly maintained furnace can't keep you comfortable if the thermostat isn't accurately reading temperatures, communicating properly with your system, or responding to your settings. Thermostat issues account for approximately 30% of "no heat" service calls, yet many of these problems can be identified and resolved even without professional help.
Common Thermostat Problems
Thermostats can fail in numerous ways, some obvious and others subtle. Dead batteries are the most common issue with battery-powered models—the low battery indicator is easy to miss until your heating stops working entirely. Improper calibration can cause your thermostat to misread room temperature by several degrees, leading to your system running too much (wasting energy) or too little (leaving you cold). Loose wire connections, dust accumulation on internal sensors, incorrect programming, or outdated models that aren't compatible with modern high-efficiency systems can all compromise performance.
Location-related issues are also surprisingly common. Thermostats placed near heat sources (fireplaces, sun-lit windows, kitchens), in drafty hallways, or in rarely-used rooms won't accurately reflect your home's overall temperature, causing your system to short-cycle or run excessively. Smart thermostats add another layer of potential issues: Wi-Fi connectivity problems, software glitches, incorrect learning algorithms, or outdated firmware can all interfere with proper operation.
Testing Procedures
Begin with a visual inspection. Check for a blank display (indicating power/battery issues), error codes, or loose mounting on the wall. If battery-powered, replace batteries with fresh ones even if the low battery indicator hasn't appeared—do this annually as preventive maintenance.
Next, perform a functional test. Set your thermostat to "heat" mode and increase the temperature setting 5 degrees above current room temperature. You should hear the system activate within seconds to a few minutes (the exact timing depends on safety delays built into your system). Stand near a vent and verify warm air is flowing within 1-2 minutes for furnaces (heat pumps may take 5-10 minutes to produce noticeably warm air).
Check calibration by placing an accurate thermometer next to the thermostat for 15-20 minutes and comparing readings. If there's more than a 2-degree discrepancy, the thermostat may need recalibration or replacement. For programmable and smart thermostats, review your programmed schedule to ensure it reflects your current routine—schedules set months ago may no longer match your household's needs.
Test all fan settings (auto, on, circulate) and verify both heating and fan operations respond correctly. Check that the temperature display updates appropriately and that any smart features (remote access, geofencing, learning algorithms) are functioning as expected.
DIY vs. Professional
Testing your thermostat is purely DIY, requiring no special tools or technical knowledge. Battery replacement and basic programming are straightforward tasks for any homeowner. However, thermostat replacement can be more complex, particularly when upgrading from an old system to a smart thermostat or when dealing with compatibility issues between your new thermostat and older
3. Inspect and Clean Vents, Ducts & Returns
Your ductwork is the the network that delivers heated air throughout your home and returns cool air to be reheated. Even with a perfectly functioning furnace and clean air filter, blocked, leaky, or dirty ducts can drastically reduce system efficiency, create uncomfortable temperature variations between rooms, increase energy bills, and circulate dust and allergens throughout your living spaces. Studies show that typical duct systems lose 20-40% of heated air through leaks, poor connections, and inadequate insulation, directly translating to wasted energy and higher utility bills.
Begin your inspection with all supply vents (where heated air flows out) and return vents (where air is drawn back to the system). Remove vent covers and grills, and examine them for dust buildup, pet hair, debris, or obstructions. Look inside the visible portions of ducts with a flashlight for dust accumulation, mold growth (appears as dark spots or fuzzy patches), disconnected sections, or pest evidence (droppings, nesting materials).
Signs You Need Professional Duct Cleaning
While basic vent cleaning is a good DIY task, professional duct cleaning becomes necessary under certain conditions. Schedule professional service ($300-500 for a full home) if you notice:
- Visible mold growth inside ducts or on vent covers (not just dust)
- Persistent musty or stale odors when the heating runs
- Recent rodent or insect infestation in ductwork
- Substantial visible debris or dust clouds when system starts
- Recent home renovation that generated significant dust
- You or family members experiencing worsening allergies or respiratory issues
- Ducts haven't been cleaned in 5+ years and you have pets or smokers
- After purchasing a home with unknown duct maintenance history
Professional duct cleaning uses specialized high-powered vacuums and rotating brushes to clean the entire duct system, including areas homeowners can't access. Legitimate companies follow NADCA (National Air Duct Cleaners Association) standards, which include cleaning all supply and return ducts, registers, grills, diffusers, heat exchangers, coils, drip pans, and the air handling unit.
4. Check the Furnace or Heat Pump Components
Whether you have a gas furnace, electric furnace, heat pump, or boiler, these complex systems require regular inspection and heater maintenance to operate safely, efficiently, and reliably. Component wear, dirt accumulation, mechanical misalignment, and normal aging can all compromise performance, increase operating costs, create safety hazards, and lead to unexpected mid-winter breakdowns. According to industry data, over 75% of heating system failures are due to poor maintenance, meaning most emergency service calls are entirely preventable with regular attention.
Gas Furnace
For gas furnaces, several critical components require attention. The burners should burn with a steady blue flame (yellow or orange flames indicate incomplete combustion and potential carbon monoxide production requiring immediate professional attention). Burners can become clogged with dirt and corrosion, reducing efficiency and creating safety concerns. The heat exchanger, blower motor and fan, Flue pipes and venting, flame sensor and so on.
Heat Pump
Heat pumps require attention to both indoor and outdoor units. The outdoor unit should be clear of debris. Remove leaves, grass clippings, snow, ice, and vegetation within 2 feet of the unit. Inspect the coils for dirt, damage, or bent fins (which can be carefully straightened with a fin comb). Check that the unit sits level and isn't sinking into the ground. Listen for unusual noises when running. Also inspect refrigerant lines running between indoor and outdoor units for damaged insulation. Exposed lines lose efficiency and can freeze, causing system damage.
Warning Signs Requiring Immediate Professional Attention
Contact our
- Yellow or orange burner flames instead of blue
- Strong gas odor near the furnace
- Soot or black residue around the furnace
- Visible cracks or holes in heat exchangers or flue pipes
- Unusual odors (burning, rotten eggs, musty smells)
- System repeatedly cycling on and off
- Significant rust or corrosion on critical components
- Water pooling around the furnace
- Persistent loud or unusual noises during operation
- CO detector alarms (evacuate immediately and call 911)
DIY vs. Professional
Many homeowners can handle visual inspections, cleaning accessible surfaces, changing filters, clearing debris from around outdoor units, and identifying obvious problems. However, tasks involving gas connections, electrical components, refrigerant, combustion analysis, internal component adjustment, or anything requiring specialized tools should always be performed by licensed HVAC technicians. Gas furnaces particularly require professional expertise due to serious safety concerns. Improper work can create deadly carbon monoxide leaks, fire hazards, or explosions.
It's a good idea to perform basic maintenance tasks throughout the year on your own while scheduling annual professional tune-ups before heating season. This ensures thoroughness while managing costs effectively.
5. Test Safety Devices (CO Detectors & Smoke Alarms)
Heating systems, particularly fuel-burning furnaces, boilers, and supplemental heaters, introduce serious safety risks to your home. Carbon monoxide (CO) an odorless, colorless, tasteless gas produced by incomplete combustion kills over 400 Americans annually and sends 20,000+ to emergency rooms. Winter months see the highest incidence of carbon monoxide poisoning because heating systems run extensively, homes are sealed tight with reduced ventilation, and supplemental heat sources like fireplaces and portable heaters see increased use. Smoke alarms save lives when heating equipment malfunctions.
Every home with fuel-burning appliances (gas furnace, gas water heater, fireplace, wood stove, attached garage) should have CO detectors on every level of the home, including the basement, and within 10 feet of each sleeping area.
Testing these devices before winter isn't just good practice – it could literally save your family's lives.
Signs of Carbon Monoxide Exposure
Because CO is undetectable without equipment, know the symptoms: headache, dizziness, nausea, confusion, shortness of breath, and flu-like symptoms that improve when away from home. If your CO alarm sounds or you suspect CO exposure, immediately evacuate all people and pets, call 911 from outside the home, and don't re-enter until emergency responders declare it safe.
DIY vs. Professional
Testing and maintaining safety devices is entirely DIY and requires no specialized skills—just consistent attention and follow-through. However, if alarms frequently trigger without apparent cause, if you experience any symptoms of CO exposure, or if you're unsure whether your home has adequate detector coverage, consult with a professional. Also trained
--
Winter heating system preparation isn't just about comfort, it's about safety, efficiency, and financial protection. The time and modest expense invested in pre-winter maintenance pays dividends throughout the heating season and for years to come.
Schedule a professional maintenance
Take Action Now! Don't wait for the first cold morning when you realize your heating system isn't working. Set aside a weekend afternoon now, while weather is still moderate, to work through this checklist. Create recurring calendar reminders for monthly tasks like filter changes and detector testing. Schedule our professional heating system maintenance before Las Vegas


